Kali Linux: How to Capture Screenshots Like a Pro
Taking screenshots is a common task you need to master, but when you are using a new system (like Kali Linux), you don’t necessarily know all the tips and tricks. Modern desktop environments have a nice tool to take screenshots, but you can also find even better solutions in the packages repository. I will share all my secrets with you in this article.
Kali Linux comes with a preinstalled tool to take screenshot (Xfce4-screenshooter). It’s available by default, and include most features, like full-screen, window or area capture. Other options are available in the default repository to get even more features or for specific situations.
Let’s start with the built-in tool, as you already have it on your system, and I’ll then show you two other applications I like.
Your essential Linux handbook
Want to level up your Linux skills? Here is the perfect solution to become efficient on Linux. 20% off today!
Download now
Capture screenshots with the built-in tool on Kali Linux
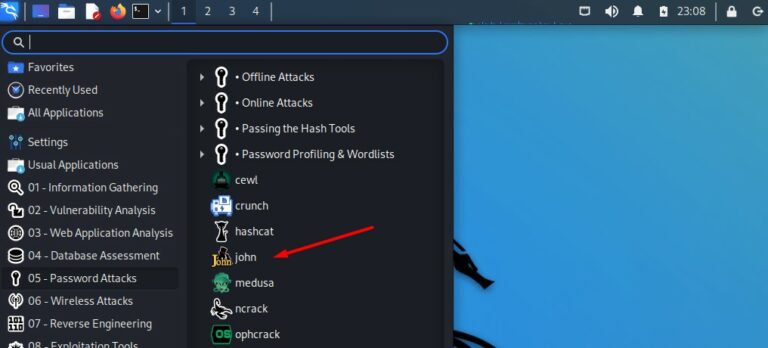
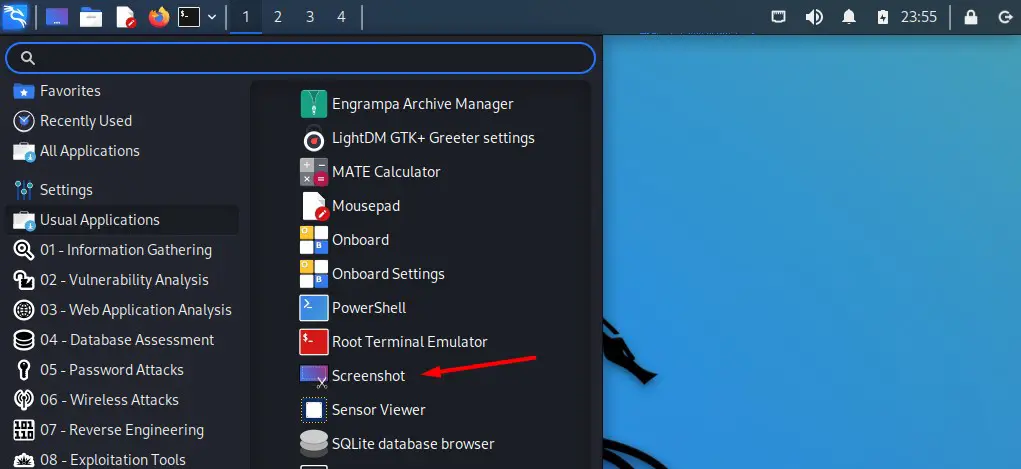
The default tool to take screenshots on Kali Linux is available in the main menu directly after the installation. Search “screenshot” in this menu, or go into “Usual applications” and find the “Screenshot” shortcut.
If for any reason, you can’t find it, you may need to install it manually. The package name is “xfce4-screenshooter”, so you can open a terminal and type:sudo apt install xfce4-screesnhooter
Features
Join the Complete Ethical Hacking Course Bundle and step into the world of cybersecurity.
Learn to think like a hacker and protect systems with this comprehensive course.
The screenshot application interface has an intuitive window with a few features, it looks like that:
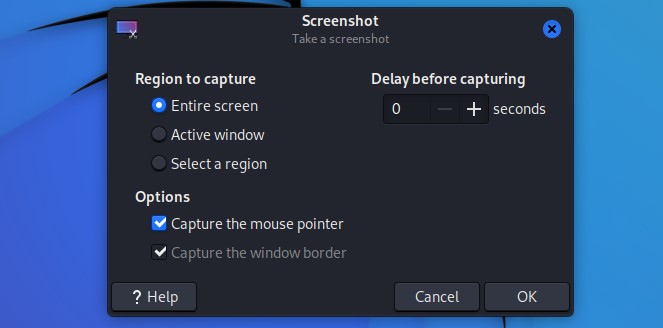
You have the choice between 3 main ways to take a capture:
- Entire screen: As the name suggests, it will capture everything. In most cases, it’s not the best option, especially if you have two monitors (it will capture both in a giant image).
- Active window: It will only capture the current application, which is probably the most useful method.
For example, if you get an error in a terminal, start this tool, choose “Active window” and you can share the error message to the developers or support contact. - Select a region: That’s the one I use all the time (including when writing this article). After choosing this option, you’ll use your mouse to select the area on the screen that you want to capture (that’s why I have a bit of the wallpaper on all my screenshots, I’m not only taking captures of the active window).
On the same window, you can also choose if you want to have the mouse pointer on the screenshot or not, and if you want to delay the capture (can be useful if you need to open a menu in the active window for example).
Download your exclusive free PDF containing the most useful Linux commands to elevate your skills!
Once the screenshot take, the tool will give you several options to save the capture:
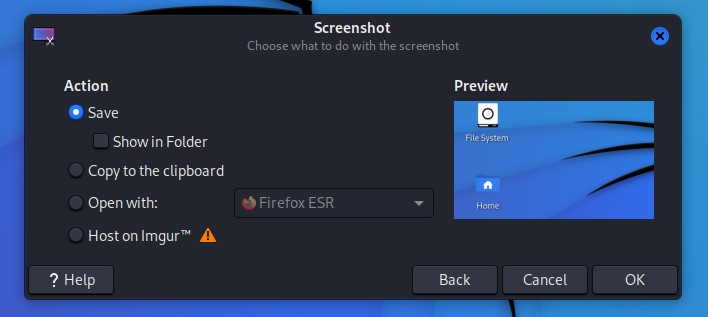
- Save: create a new image file on your computer with the capture taken.
- Copy to the clipboard: so you can paste it in a document, online chat or wherever pasting an image is supported.
- Open with: if you have an application where you want to use the screenshot (I guess an image editor or something). I’ll generally save it and then open it with the application, but you have the option anyway.
- Host on Imgur: if you want to share the image online, there is a nice feature allowing you to directly upload it to this free service. You’ll get a URL that you can share with someone or use on forums.
So, even if this tool is included by default, it already includes most features. I guess, in many cases, it should be enough for you. Keep reading if you need more, as I’ll suggest another tool later, but first, let’s see a few tips you can use with this tools.
Add a shortcut to the top panel
If you regularly need to take screenshots on Kali Linux, it’s possible to add a shortcut for the screenshot tool in the top bar. Here is how to do this:
- Do a right-click on the top bar.
- Choose “Panel” > “Add new items…”
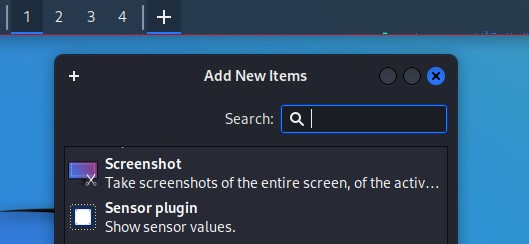
- In this list, click on “Screenshot”.
You can use the search engine to filter the list, or just scroll until you find it. - A new shortcut will be added in the top-right corner.
You can go into “Panel preferences” to change the shortcut position.
Once done, one click on this icon will open the tool. So, you have it handy all the time if you need it.
Keyboard shortcuts
Finally, there are a few keyboard shortcuts you need to know to go even faster when taking screenshots on Kali Linux:
- PrintScr: Takes a full-screen capture directly, and save it in your “Pictures” folder.
No configuration, the tool is not even popping up, it saves it directly. - Alt + PrintScr: Takes a capture of the current active window.
The tool will ask you where to save the picture, but you skip the first step. - Shift + PrintScr: Start the zone seletion for capturing an area.
As with Alt + PrintScr, you skip the first step, and will then be asked where you want to save the file.
With these shortcuts, you’ll really save time, especially if you use this tool all the time like me :-).
Other options to take screenshot on Kali Linux
If the built-in tool to take screenshots on Kali Linux is not ideal for your use case, two alternatives might be worth considering:
- Flameshot: includes way more features than the built-in tool.
- Scrot: if you need to take screenshots from the terminal (SSH, scripts, …).
Let’s see how they work.
Flameshot: with all the features you need
Flameshot is a great tool to take captures on Linux, and is available on Kali Linux. It adds interesting features like drawing on the screenshot, adding text, flipping the image, etc. If you need more than the basic options, you’ll love it.
It’s not installed by default on Kali Linux, so you first need to install it.
It’s available in the repository, so you can simply use APT to do this.
Open a terminal and type these commands:sudo apt update
sudo apt install flameshot
It’ll immediately be available in the main menu (search for “flameshot”), and has a few nice shortcuts built-in:
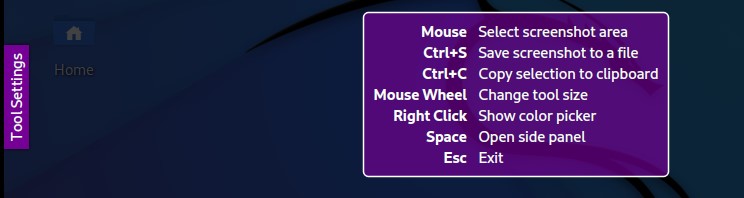
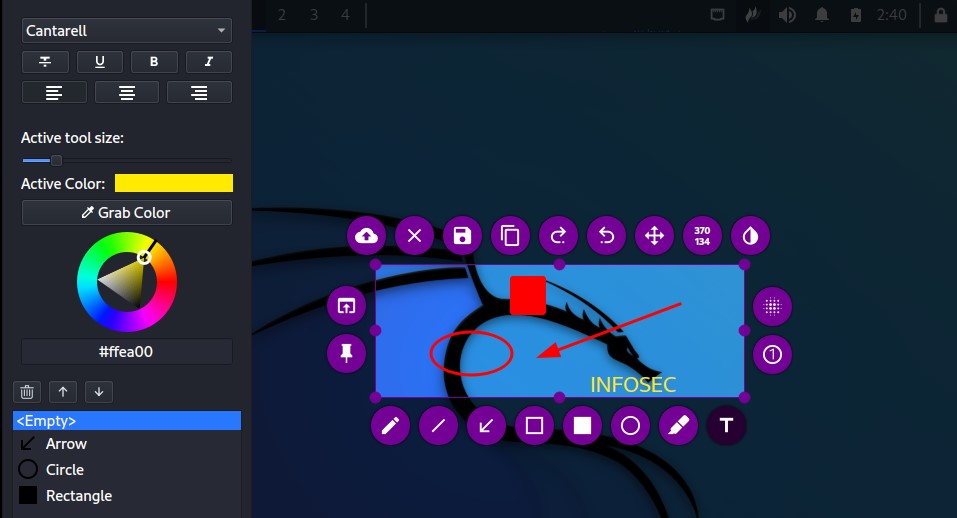
But the main strength of Flameshot is that you almost have an editing tool available while taking the screenshot.
For example, if you select an area, you’ll have all this icons available, each one corresponding to a feature:
Download your exclusive free PDF containing the most useful Linux commands to elevate your skills!
On my example, you can see that I circled something, added a square, an arrow and a text. You can change the color for each feature, and you have even more options available to adjust the image size, orientation, location, etc.
Almost everything is possible with this tool, and it’s not complicated. So, I highly recommend testing it, and in a few minutes you’ll be up to speed and ready to use it in any real situation.
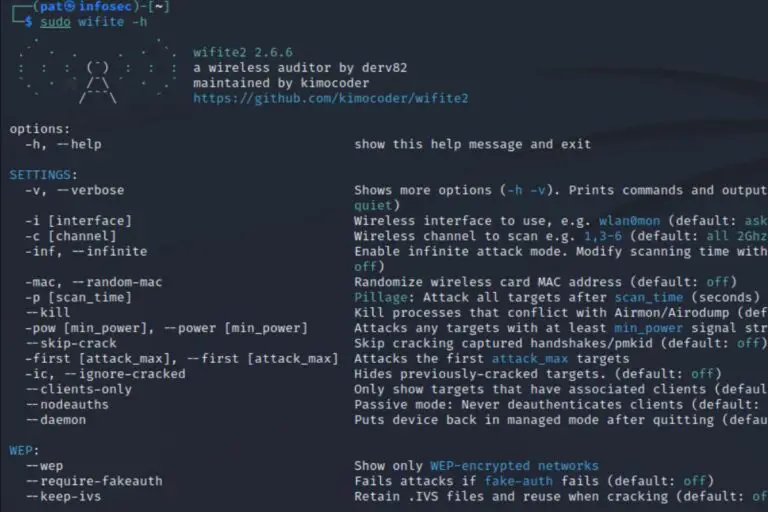
Scrot: screenshots from the terminal
Scrot is a simple tool, but that is very powerful when you need to take screenshots from the command line on Kali Linux.
Secure your spot in the Accelerator Program, with early access to exclusive resources.
Get 1000+ classes, unlimited mentorship, and more.
Let’s say you are connected to a remote server via SSH and want to see what’s on the screen? Well, none of the previous tools will help you, but Scrot can do this.
First, you need to install it on your system. On Kali Linux, it’s also available in the default repository:sudo apt update
sudo apt install scrot
If you are connected via SSH, you first need to tell which display you want to capture.
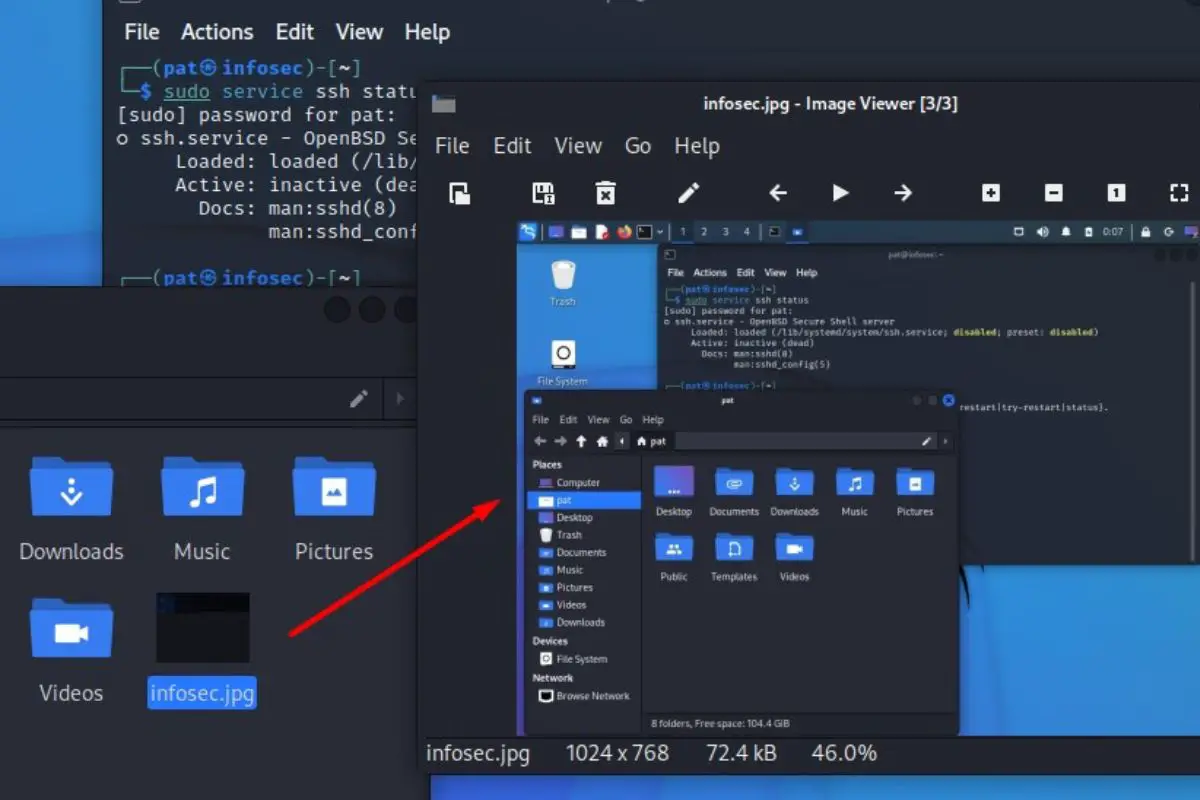
In most cases, you can set the DISPLAY variable to 0, as it’s the default option:export DISPLAY=:0Then, the basic syntax of scrot is:scrot <image-file.jpg>
Here is an example:
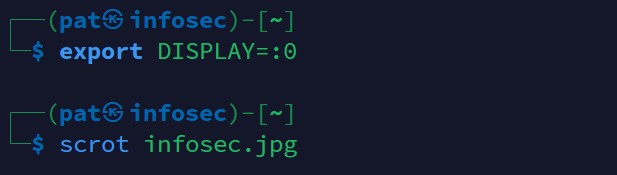
In this example, it creates an image named “infosec.jpg” in the current folder, including a full-screen capture:

You can use this command from the Kali Linux environment directly, or most likely inside scripts or other applications where a screenshot can be useful.
I showed you the basic use of this command, but many options are available. You can use man to see a list of the features:man scrot
You can also check the online documentation on Unix.com.
Whenever you’re ready for more security, here are things you should think about:
- Break free from Gmail:
You should be able to choose what happens to your data. With Proton, only you can read your emails.
Get private email.
- Protect yourself online:
Use a high-speed Swiss VPN that safeguards your privacy. Open-source, no activity logs.
Get Proton VPN risk-free.
- Master Linux commands:
A sure method to learn (and remember) Linux commands. Useful ones only, one at a time, with clear explanations.
Download the e-book.