How to Install Nessus on Kali Linux: A quick & easy guide
Nessus is a free vulnerability scanner that helps security professionals find and fix vulnerabilities on remote computers and servers. It can be installed on most systems, including Kali Linux. In this article, I’ll show you step-by-step how to do it in a few minutes.
An installer for Nessus can be freely downloaded from the Tenable website (the software editor) and installed on Kali Linux. Then everything is done through a web interface, where you can connect your account and try the various features offered by Nessus.
I tried it for you and will share all the steps in this article. It’s not complicated, but I recommend following them to make sure you don’t miss anything important during setup.
Your essential Linux handbook
Want to level up your Linux skills? Here is the perfect solution to become efficient on Linux. 20% off today!
Download now
How To Install Nessus on Kali Linux
Nessus is available as a Debian package from their website, so here are the main steps to get it running on Kali Linux:
- Download the latest Nessus package from the official website.
- Install it on Kali with the package manage.
- Access the web interface to start the configuration.
Let’s see how to do this in details.
Downloading Nessus
Enroll in the Complete Cyber Security Course now, and master online safety.
Learn to defeat hackers, protect privacy, and stay anonymous with over 50 hours of on-demand video.
While the official website tries to push you to buy their products right away, you can still find a way to download the package directly without having to create an account or pay anything.
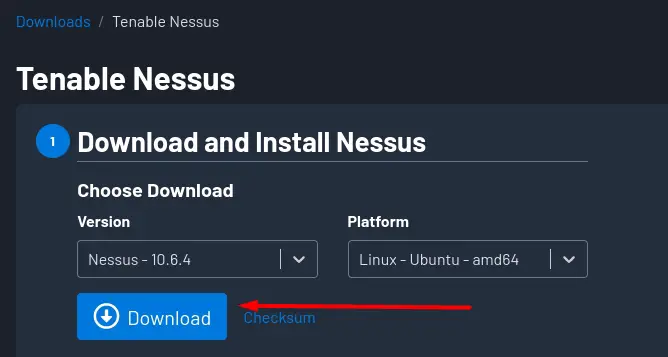
Here is the direct link to the download page. You should see a form like that at the top of the page:
Download your exclusive free PDF containing the most useful Linux commands to elevate your skills!
In the “Platform” list, pick the one corresponding to your system. Kali is not listed, but I did it with the Ubuntu version, it should be fine. Also, make sure to pick the right architecture (amd64 is the most common).
Once done, click on “Download” to get the package file on your system.
Installing Nessus on Kali Linux
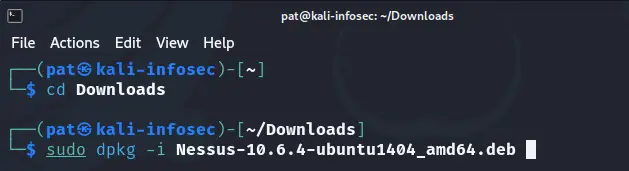
To install the Nessus package from your Downloads folder, open a terminal and type these commands:cd Downloads
sudo dpkg -i <Nessus-version.deb>
Replace the package name with the one you downloaded in the second command, like that:
Kali will install the package, and prompt you to install any required dependencies (if needed). I tried it on a fresh Kali Linux installation, and it worked right away, so I don’t think it’s necessary. But if you get any error, try to install the missing packages with APT.
Starting Nessus
Nessus works as a service, and is not necessarily starting automatically after the installation.
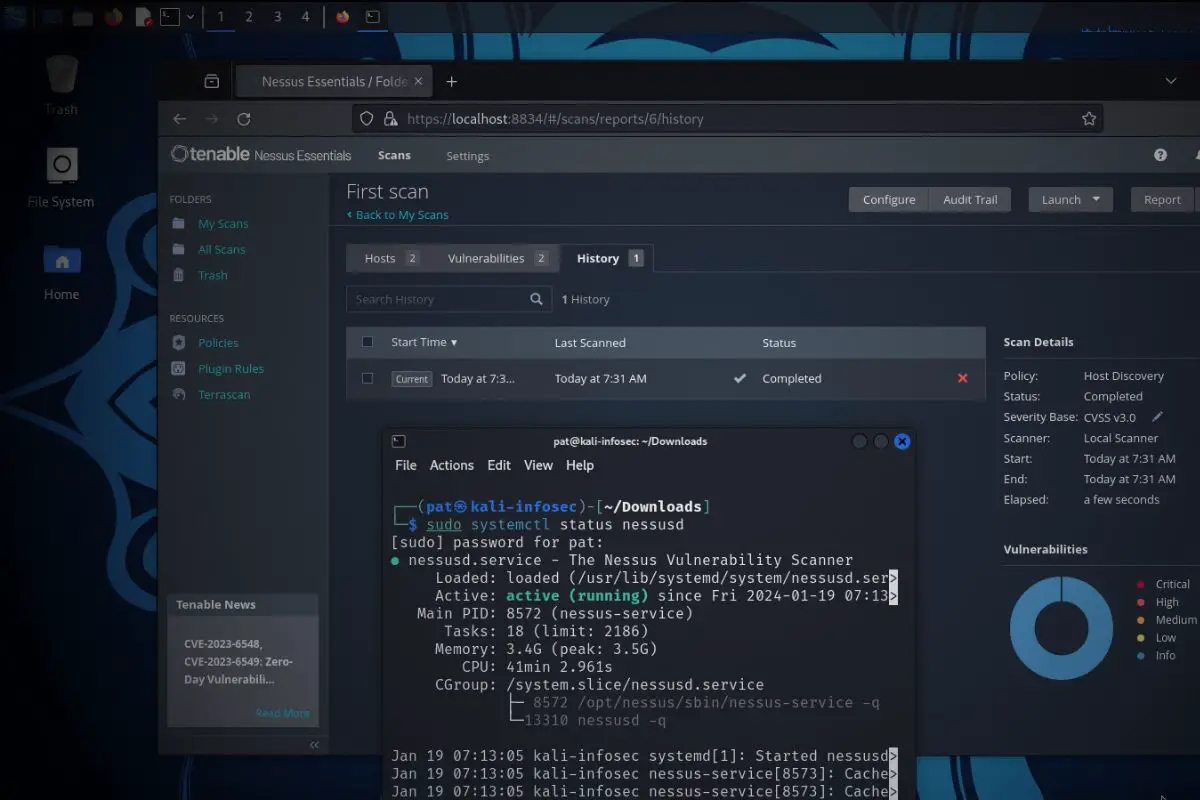
You can check the current service status with:sudo systemctl status nessusd
And start it with this command if needed:sudo systemctl start nessusd

You shouldn’t need to run it automatically on boot. It’s quite heavy on your computer’s resources, so I’d recommend starting it only when you need it.
First access to Nessus interface
Once the Nessus service started, open a web browser and go to this url:https://localhost:8834
You should get a security risk warning, as HTTPS doesn’t have a valid certificate yet.
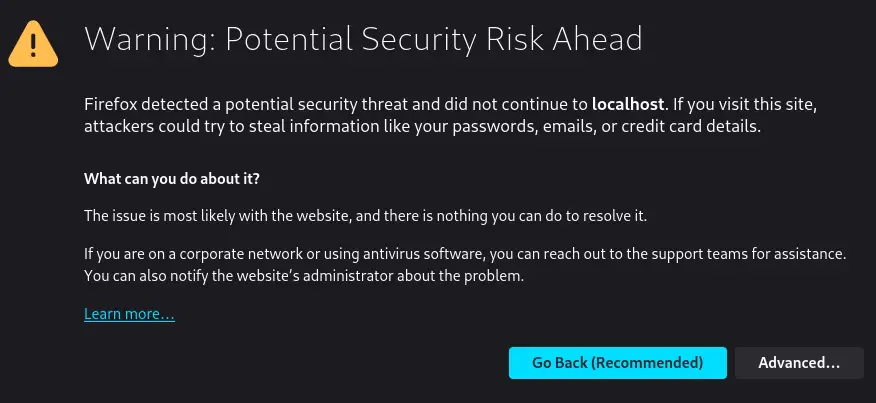
Click on “Advanced…” and “Accept the risk and continue”.
You can fix that later if you want, but for local use, it should be fine.
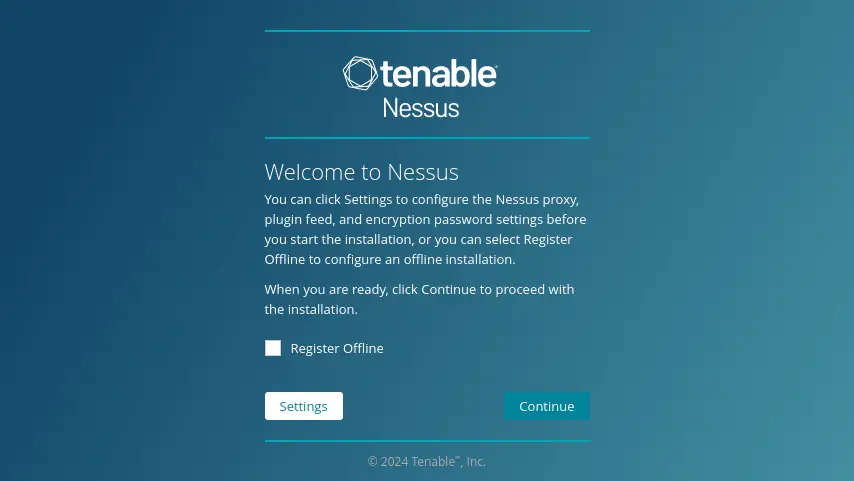
You’ll finally get the welcome wizard from Nessus in your web browser. Good job, Nessus is almost ready to use!
I’ll explain what to do with this in the next section.
First steps with Nessus on Kali Linux
Download your exclusive free PDF containing the most useful Linux commands to elevate your skills!
This article is not meant to be a full tutorial on how to use Nessus, so I won’t take up too much of your time. But I will at least show you how to complete the setup wizard and run your first vulnerability scan.
Completing the setup wizard
The goal of the setup wizard is mostly to link your installation with your account and license. Here are the main steps:
- You first need to decide which version of Nessus you want to use.
Nessus Essentials is free for personal use, but comes with many limitations (16 IPs for example).
Nessus Expert and Professional are the paid versions of the product, that you’ll likely get if you are doing this for a company.
So, if you have a license pick the corresponding one, if you just want a quick try, select Nessus Essentials: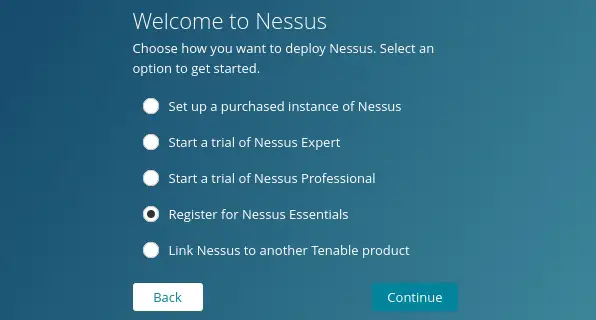
- Depending on your choice, you’ll then have to enter information to get an activation code or activate your license.
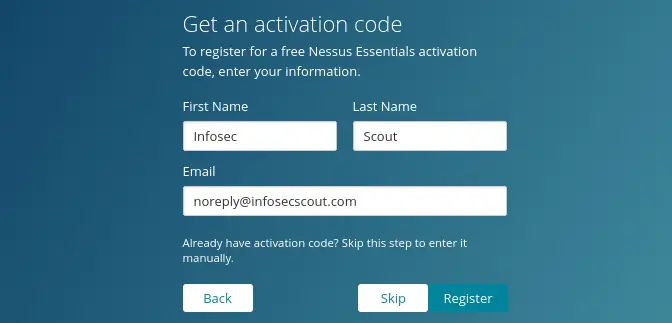
- If you are testing Nessus Essentials, you’ll then get your activation code.
- Finally, create a user account for the local instance:
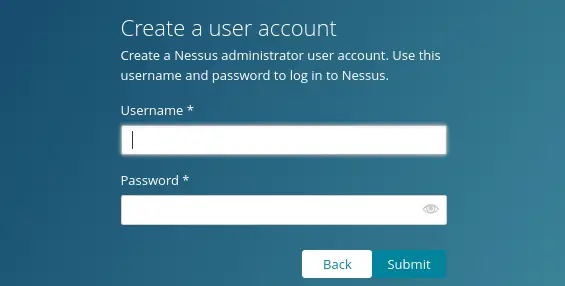
It’s the administrator account to access the web interface later on. - Once everything is done, Nessus will start the initialization process and download the required plugins:
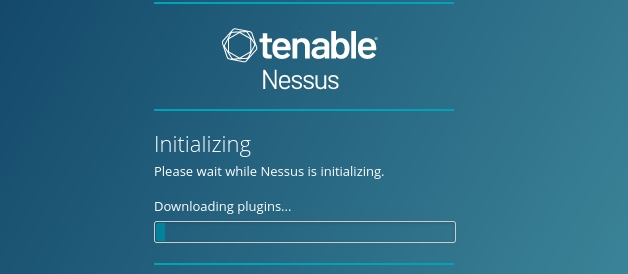
Even if you get access quickly to the full interface, it’s recommended to wait a bit before starting your first scan, while Nessus completes the installation in the background. Time to grab a coffee, you deserve it :-).
Try it for free now, with advanced security features.
2900+ servers in 65 countries. It's free. Forever.
First scan
Once the initial setup completed, Nessus is ready to use.
The goal of this tutorial is not to give you an extensive guide on how to use Nessus, I’m just focusing on the installation. But I do recommend that you do a quick scan at this point to check that everything is working as expected.
Here is how to start your first scan:
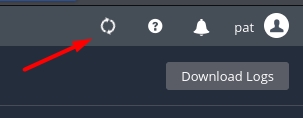
- Click on “Scans” in the top bar of Nessus.
- Click on “New scan”.
- Pick one scanner from the list of templates, like the “Host Discovery” for example.
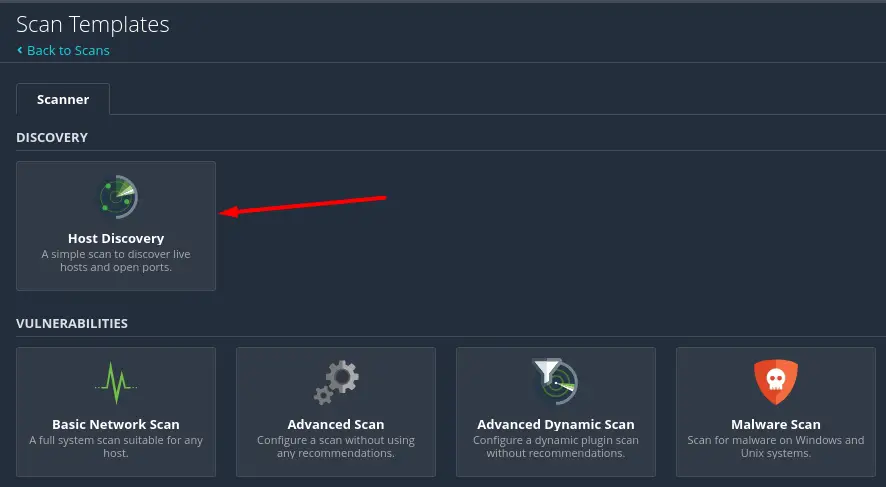
- Fill the forms according to your template.
If you picked the host discovery, simply fill the targets with your network or subnetwork you want to use. - Click “Save” to create the scan, and click on the play button to launch it.
Once the scan completed, you can click on the line to see the results.

Obviously, this is just the beginning, but we have successfully installed Nessus on Kali Linux, and it’s working as expected. From there, I recommend you to check the official documentation and other tutorials on the topic to use Nessus the way you want.
And if you want to do more with Kali Linux in terms of vulnerability scanning and exploitation, here are a few other tutorials you might be interested in:
- Getting Started with BeEF on Kali Linux: A Complete Guide
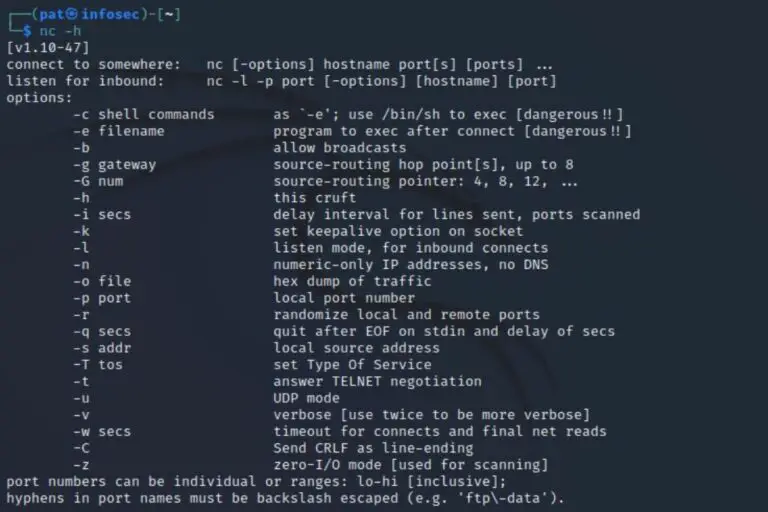
- Mastering Netcat on Kali Linux: A beginner’s guide
- Wifite: A step-by-step guide for Kali Linux users
Whenever you’re ready for more security, here are things you should think about:
- Break free from Gmail:
You should be able to choose what happens to your data. With Proton, only you can read your emails.
Get private email.
- Protect yourself online:
Use a high-speed Swiss VPN that safeguards your privacy. Open-source, no activity logs.
Get Proton VPN risk-free.
- Master Linux commands:
A sure method to learn (and remember) Linux commands. Useful ones only, one at a time, with clear explanations.
Download the e-book.