Wifite: A step-by-step guide for Kali Linux users
Cracking Wi-Fi networks is one of the main use of the Kali Linux toolkit, and it has always been. I remember playing Aircrack-NG when I was at school, many years ago. The process was a bit complicated, but hopefully, it’s now easier than ever, thanks to a new tool: Wifite. I’ll show you how to use it in the latest versions of Kali Linux.
Wifite is a command-line tool, available on Kali Linux, to crack wireless network passwords. It’s included with the essentials tools, and can be used directly on a fresh installation of Kali Linux.
Let’s start with a brief introduction about this tool, and then see how you can use it to test wireless network security.

Your essential Linux handbook
Want to level up your Linux skills? Here is the perfect solution to become efficient on Linux. 20% off today!
Download now
What is Wifite?
Wifite is a command-line tool for Linux, pre-installed on Kali Linux and used to crack wireless network passwords.
Wifite relies on different older tools, mostly the Aircrack-NG suite, making the process of scanning, auditing and detecting Wi-Fi clients easier than ever. It can also be used to attempt password crackings using different methods (Aircrack or other options we’ll see later).
And nope, Wifite is not the Nintendo thing you had in your living room over a decade ago to pretend you were exercising :-). Too young for this one? That’s what I’m talking about.
Seriously now, Wifite supports cracking of WPA/WPA2, WEP and WPS networks, and the good news is that it can also be used to attack multiple networks at once.
In short, it’s a simple and efficient tool that is commonly used by security professionals and ethical hackers to test the security of wireless networks. Let’s see how it works now.
How to install Wifite on Kali Linux
There are three ways to get Wifite on Kali Linux:
- It can be pre-installed if you choose to add the essentials tools during the installation.
- It’s available in the default repository, and can be installed with APT.
- Or it can be downloaded from the GitHub repository to get the latest version.
Try it for free now, with advanced security features.
2900+ servers in 65 countries. It's free. Forever.
I’ll give you more details about each solution in this section.
Pre-installed
In my case, Wifite was already installed on my test laptop. I think I choose to install the essentials tools during the installation, so it comes directly with this application.
Before trying the other installation method, you can do a quick check on your system:
- Open a terminal.
- Type this command:
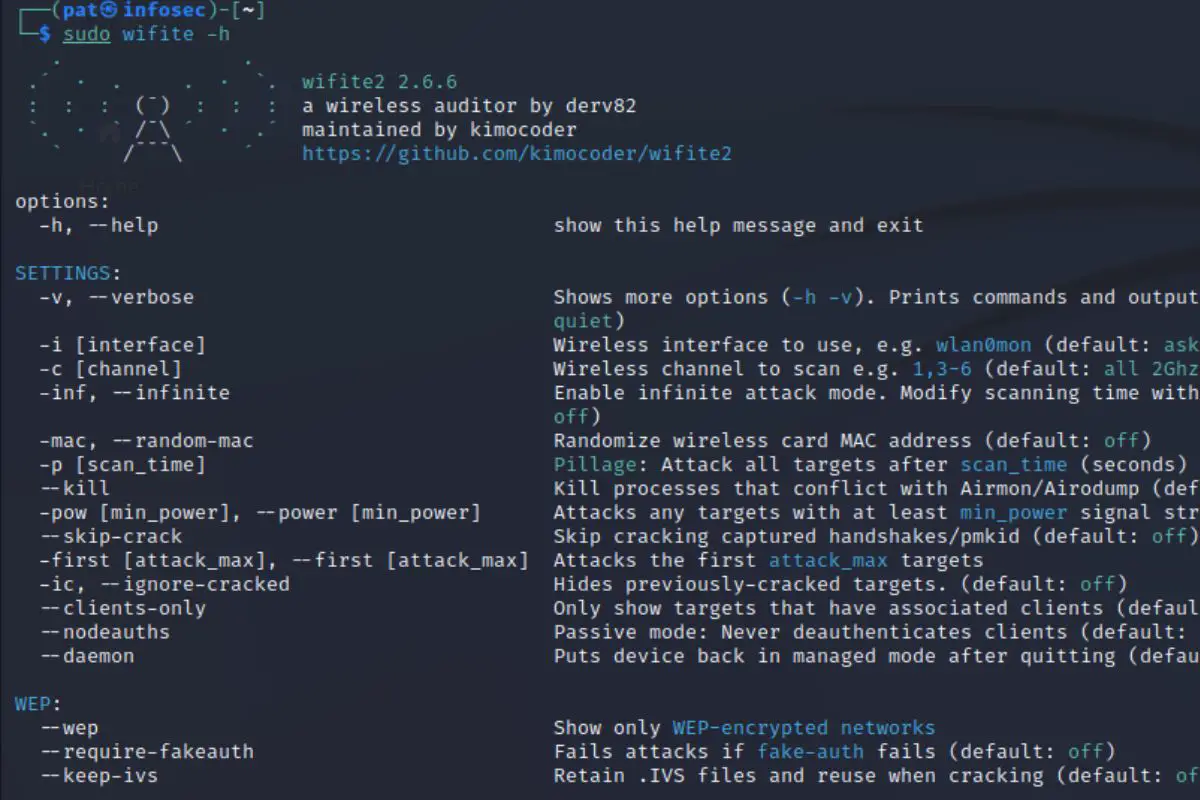
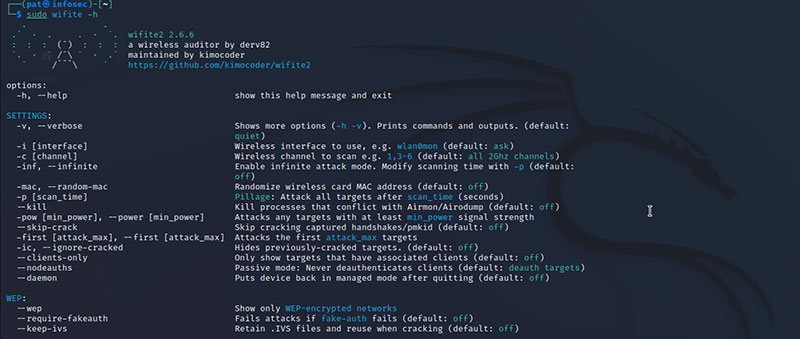
wifite - If you get a screen looking like that, Wifite is already installed on your device:
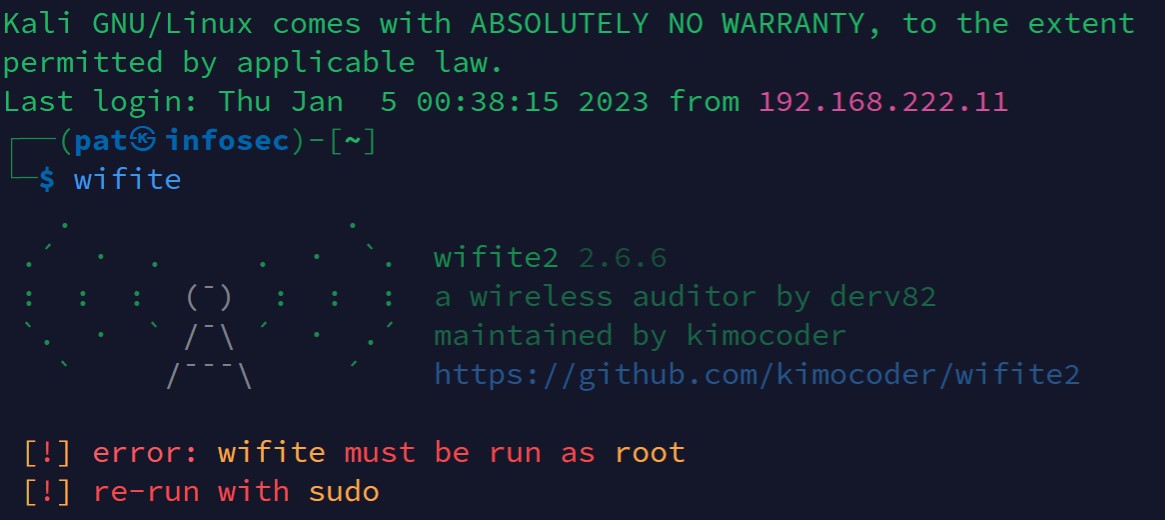
Don’t worry about the errors or warnings you get here, if you see something like that, it’s ok, you have Wifite and can skip this installation part.
Only follow one of the two installations methods below if you get an error like “command not found” when trying this. But in most cases, Wifite is probably already installed on your computer.
Installation with APT
Download your exclusive free PDF containing the most useful Linux commands to elevate your skills!
If Wifite is not already installed on your system, Wifite is included in the default package repositories of Kali Linux, so it can be easily installed using the APT package manager.
Here are the steps to install Wifite on Kali Linux:
- Open a terminal.
- Update the package repositories:
sudo apt-get update - Install the Wifite package with this command:
sudo apt-get install wifite - A few seconds later, Wifite is installed and ready to use.
You can try to run the command I gave you earlier to make sure it’s working properly:wifite
Manual installation
Even if using APT is the easiest way, it’s not always up-to-date.
So, another option you can use is to install the tool by cloning the GitHub project:
- Open a terminal.
- Create a folder where you’ll download the files and move into it.
For example:cd /opt
sudo mkdir wifite
cd wifite - Run the command
sudo git clone https://github.com/derv82/wifite2.git
The project is tiny, it should be pretty fast. - Once done, go into the “wifite2” directory:
cd wifite2 - Add the execution permission to the Python file:
sudo chmod +x Wifite.py - And you can finally run the tool directly with:
sudo ./Wifite.py
Remember to use this command in the examples I’ll give you later, it’s slightly different from the command used with the APT installation.
Note: Wifite will store temporary files in your current directory when you run it, so it might be a good idea to always run it from the same folder. Maybe you can even create a subfolder in your home directory, and then use the full path to run the Python file, for example:cd /home/pat
mkdir wifite
cd wifite
sudo /opt/wifite/wifite2/Wifite.py
You can also run the setup file to add it to your system path so that you can use the same command as with apt:sudo python3 setup.py install
Getting started with Wifite on Kali Linux
Wifite requires administrator privileges, and you shouldn’t be using the wireless interface for your interface connection. So, before anything else, make sure you have enough permissions, and use an Ethernet cable to follow the instructions on this page.
Disclaimer
Hacking a wireless network you don’t own is a crime in many countries
It’s illegal, and you can go to jail for this. This tutorial is here for an educational purpose only.
Only try this on your own network, to learn how hackers work and then protect yourself.
Don’t use these techniques on other networks without the owner permission.
In no case, I can be held responsible for your actions.
Now that this is clear, let’s get down to the practice.
Scanning wireless networks
By default, Wifite will start scanning for wireless networks directly.
Just run the application with:sudo wifiteAnd wait a few seconds to get a list of the detected networks, the encryption type they use, and other information like the number of clients, and the signal power.
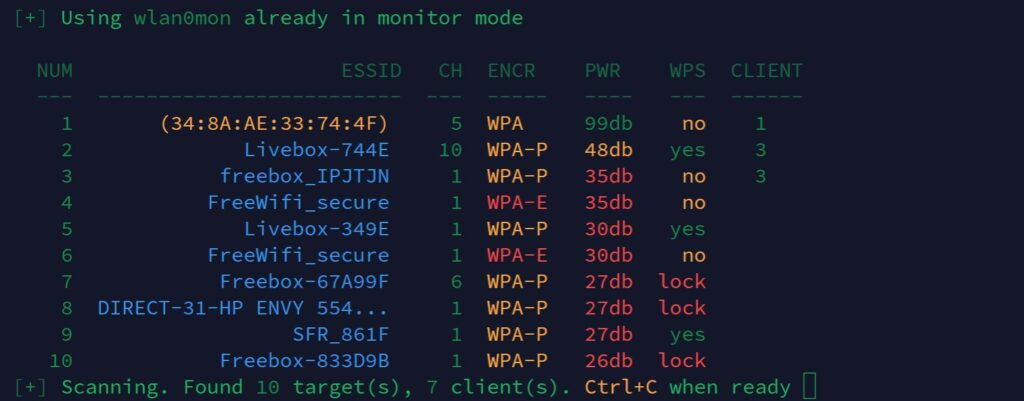
Note: You must use sudo (or root) to run Wifite, or it won’t be able to change the wireless card settings.
Select targets
After running the scanner for a while, you should have a good overview of the networks available near you. You can then press “CTRL+C” to select one or several targets.
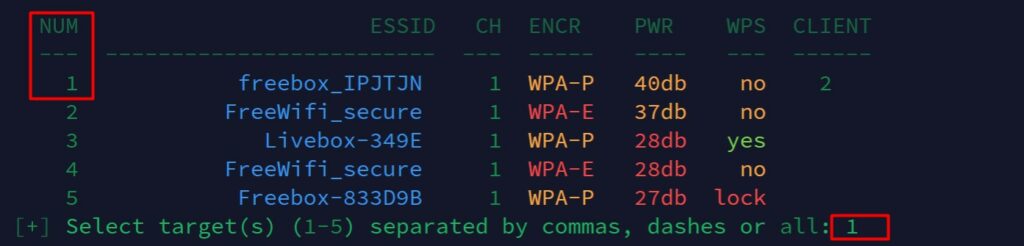
To capture authentication packets and improve the probability to crack the network password, it’s better to start with a network that has a few clients connected.
As you can see on my screenshot, I just typed the number corresponding to one of the wireless network detected during the scan.
It’s possible to choose several targets (by separating the IDs with commas). It’s even possible to attack them all, even if it’s not necessarily recommended (stay focus on one target and then try another later if it doesn’t work).
Cracking the Wi-Fi password
Once the target selected, Wifite will start focusing on the selected network(s), listening to authentication process and trying to reauthenticate clients to capture handshakes.

A handshake typically involves a series of messages exchanged between the devices to authenticate each other and negotiate the details of the connection. During this process, the client will send an encrypted version of the key to the access point, that’s the packet Wifite will intercept to try to crack the password.
Once Wifite captures a handshake, you’ll get something like that on your screen:
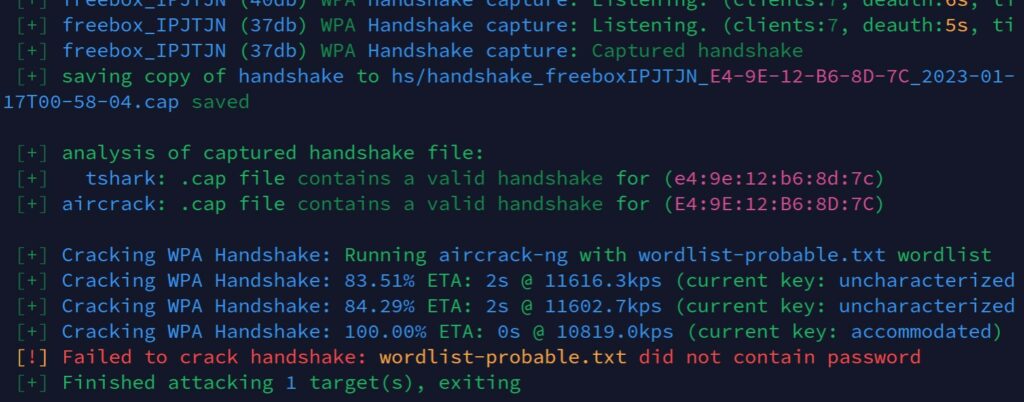
The captured handshake is saved to a subfolder (hs) and Wifite will use the tools available to attempt to crack the password (in this example, AirCrack-NG is used, with a basic word list). That’s why I told you to always run Wifite from the same folder.
The default word list is pretty small, so there is a very low chance to find a typical password with the default options, but you can try other options to improve the likelihood of cracking the Wi-Fi password. I’ll tell you more about that in the next part.
Going further
Download your exclusive free PDF containing the most useful Linux commands to elevate your skills!
You now know the basics of Wifite on Kali Linux, here are a few tips to go a bit further.
Using another word list
By default, Wifite uses a local word list that is really small (wordlist-probable.txt), but you can generate your own word lists, or simply download bigger ones from online sources.
For example, here is a GitHub repository where you can download a few of them. The biggest ones are not available (and most of the time they aren’t free), but it’s already good enough to do a few more tests (especially for English users).
Let’s say you want to try with the Richelieu French Top 20000 list from this repository.
You’ll first download it on your computer with:wget https://raw.githubusercontent.com/danielmiessler/SecLists/master/Passwords/richelieu-french-top20000.txt
You can also use your browser directly if the command line is not your friend :-).
Try it for free now, with advanced security features.
2900+ servers in 65 countries. It's free. Forever.
Then, you can run Wifite, specifying the file in the parameters instead of the default file:sudo wifite --dict richelieu-french-top20000.txt
If you already have handshake files in your “hs” folder, you don’t need to redo the whole process (scan, capture, etc.) to try another list.
You can simply run this command:sudo wifite --crack --dict <filename>It will just try the same handshake(s) with the specified word list.
Repeat this process with all your files.
Other options
I showed you the basic usage of Wifite, but many other options are available.
You can filter the network detected, choose the types of attacks, etc.
Use this command to see all the options available:sudo wifite -h
And obviously, the GitHub project page is the place to go to get more details on how to use the advanced options of this tool.
Using other tools to crack the password
Wifite is like a meta-tool, giving you access to many other tools in an easier interface. Before that, cracking a Wi-Fi password directly with Aircrack-NG was way more complicated (check the “old” procedure here).
But it’s based on the same technologies, so you can still use the other tools if needed.
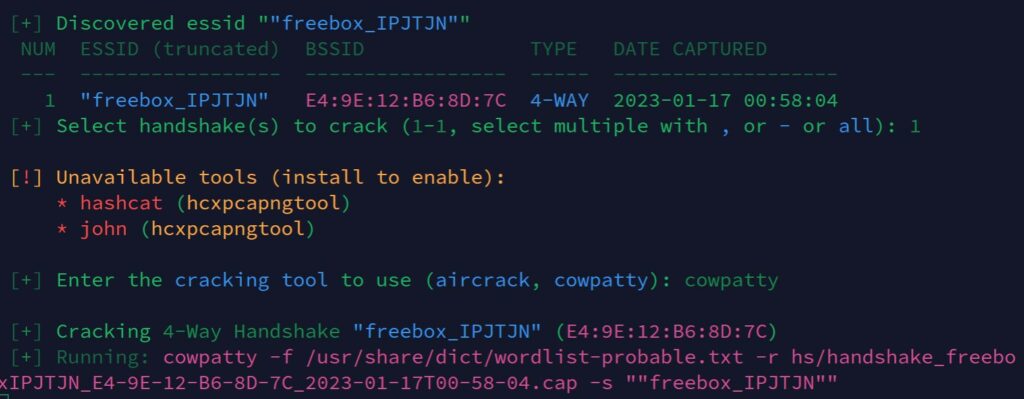
For example, when you run the crack command as mentioned earlier:sudo wifite --crackWifite will suggest using other tools like Hashcat, John the ripper or Cowpatty.
You may need to install these tools before using them, but Wifite will make your life easier, by running the commands directly.
Here is an example below with Cowpatty:
If you liked this tutorial, I have many other articles about Kali Linux on this website. Here are a few suggestions:
- Does Kali Linux have a VPN client? (Get one for free)
- Getting Started With John The Ripper On Kali Linux
- How To Install & Use Wireshark On Kali Linux
Whenever you’re ready for more security, here are things you should think about:
- Break free from Gmail:
You should be able to choose what happens to your data. With Proton, only you can read your emails.
Get private email.
- Protect yourself online:
Use a high-speed Swiss VPN that safeguards your privacy. Open-source, no activity logs.
Get Proton VPN risk-free.
- Master Linux commands:
A sure method to learn (and remember) Linux commands. Useful ones only, one at a time, with clear explanations.
Download the e-book.