How to Make a Kali Linux Bootable USB Drive on Windows
Unlike Windows, Ubuntu, or macOS, Kali Linux is not necessarily used as a primary operating system. I generally use it as a temporary system, for auditing and pentesting, so I don’t have to keep it on my computer forever (even if you can). Today, I’ll show you how to create a USB drive with Kali Linux on it, so you can boot it whenever you need to.
Kali Linux can be installed on a USB drive to boot a computer on time without affecting the main operating system. Creating a bootable USB drive with Kali Linux on it can be done by downloading the Kali image and flashing it with a tool like Balena Etcher.
This article is a step-by-step tutorial, showing you how to do this effectively and safely.
Your essential Linux handbook
Want to level up your Linux skills? Here is the perfect solution to become efficient on Linux. 20% off today!
Download now
Prerequisites
Before we start creating a Kali Linux bootable USB drive using Balena Etcher, let’s make sure you have everything needed for the process.
- A computer: I’ll use my laptop to create the bootable USB drive and start Kali on it, but it can be two different devices. Just make sure the target computer supports booting from USB, but this is a standard feature on most computers these days (you can even do it with a Raspberry Pi).
- USB Drive: An 8GB or larger USB flash drive is required. This size will hold the Kali Linux image and leave room for any additional files you may want to add. Pick a bigger one if you’ll store other files on it (like wordlists), but for the base system it should be enough.
- Internet Connection: We’ll need to download the Kali Linux image and Balena Etcher software.
Try it for free now, with advanced security features.
2900+ servers in 65 countries. It's free. Forever.
With these items in place, you’re ready to move on to the next step in this guide.
Step 1: Downloading Kali Linux image
The first thing we need is to download the Kali Linux image. It’s a simple process, but important to get right.
Download your exclusive free PDF containing the most useful Linux commands to elevate your skills!
Here’s how you do it:
- Visit the Official Kali Linux Downloads Page: Go to Kali Linux’s official website to find the download section.
- Choose Your Version: Select the version of Kali Linux you want to download. If unsure, go for the standard version, which works well for most users.
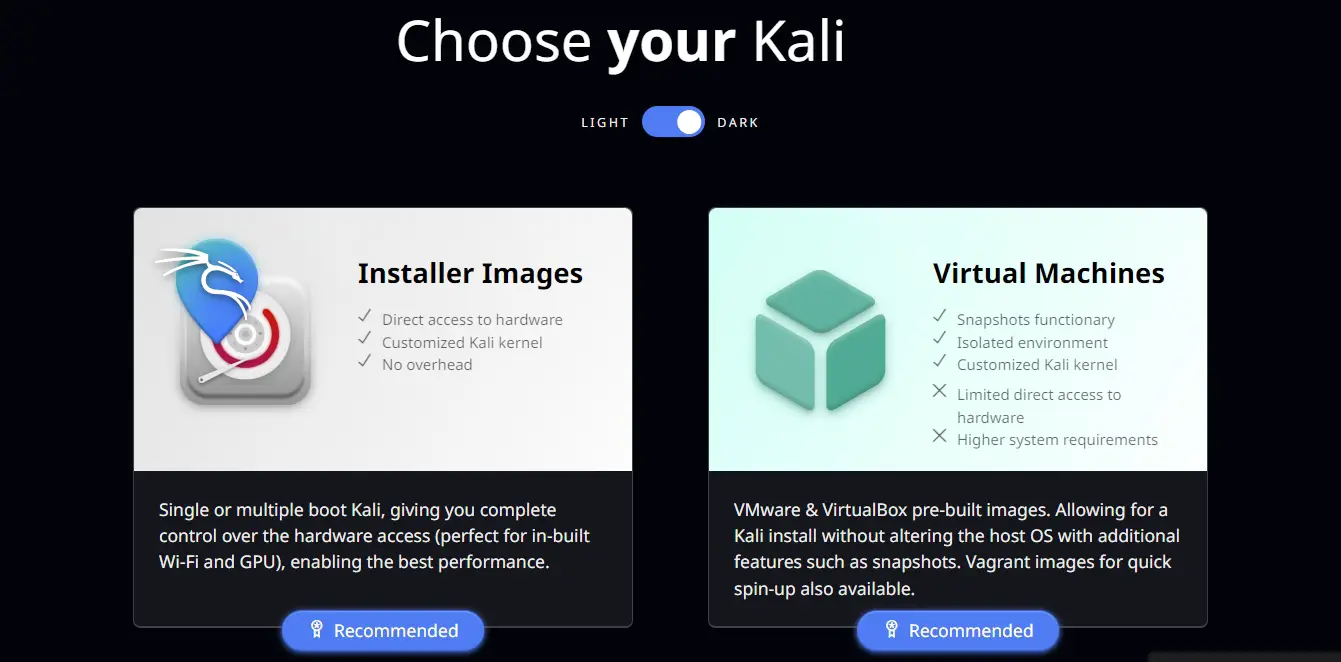
You can, for example, get the Live USB image, that is built just to do this. - Download the ISO File: Click on the download link for your chosen version. This will start the download of the Kali Linux ISO file. It might take a while, depending on your internet speed.
With the Kali Linux ISO file downloaded, you’re ready to move on to installing Balena Etcher and creating your bootable USB drive.
Step 2: Installing Balena Etcher
Balena Etcher is the tool we’ll use to create your Kali Linux bootable USB. It’s free, easy to use and available on all operating systems.
I’m showing you the steps from a Windows computer here, but it should be very similar from any operating system:
- Visit Balena Etcher’s Website: Navigate to the Balena Etcher website.
- Download the Software: Look for the download option that matches your operating system. Since we’re focusing on Windows, select the version for Windows.
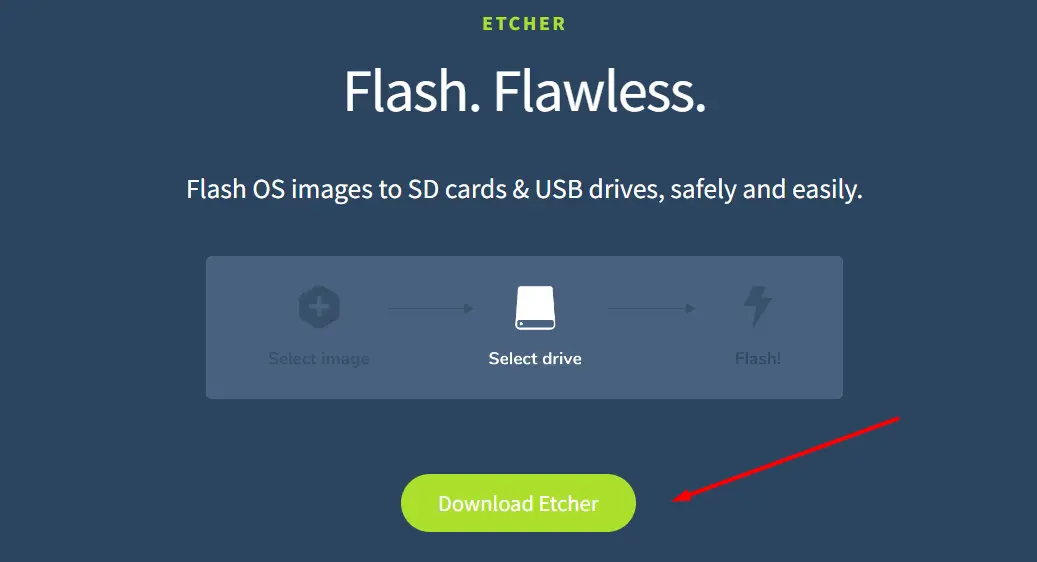
You’ll have a list of options, pick the one corresponding to your operating system and architecture.
For Windows, you can also decide between the installer or a portable file (for one-time use). - Install Balena Etcher: Once the download is complete, locate the downloaded file (usually in your Downloads folder) and open it. Follow the installation instructions. It should be a straightforward process, just a few clicks.
- Launch Balena Etcher: After installation, open Balena Etcher. It’s ready to use to create your bootable USB drive.
Now that Balena Etcher is installed, you’re all set to flash the Kali Linux ISO file onto your USB drive in the next step.
Step 3: Flashing the bootable USB with Etcher
We now have everything we need to flash the Kali Linux image to your USB drive.
That’s how we can create a bootable USB drive with Etcher:
- Launch Balena Etcher: Open the Balena Etcher application you installed in the previous step.
The interface looks like that: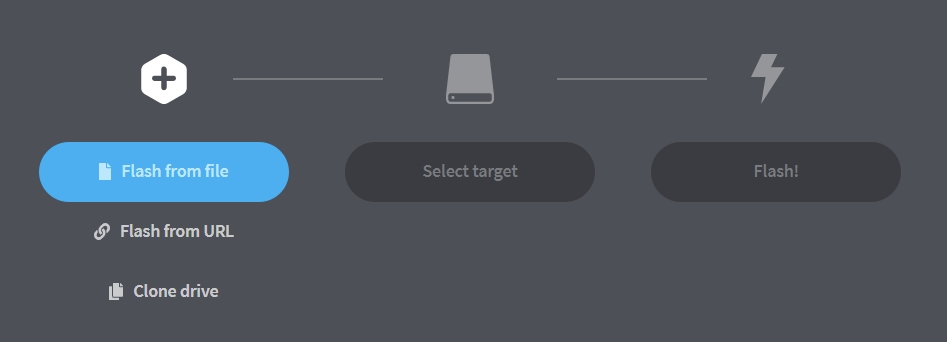
- Select the Kali Linux ISO File: Click on the first button, “Flash from file” and navigate to the location where you saved the Kali Linux ISO file (like your “Downloads” folder).
Select the ISO file to use it with Etcher. - Insert Your USB Drive: Plug your USB drive into your computer if you haven’t already.
Make sure it’s the correct drive because all data on it will be erased. - Choose Your USB Drive: In Balena Etcher, click on “Select target” and choose the USB drive you’ve inserted.
Double-check to ensure it’s the correct drive. - Start the Flashing Process: With the ISO file and the USB drive selected, click “Flash!”.
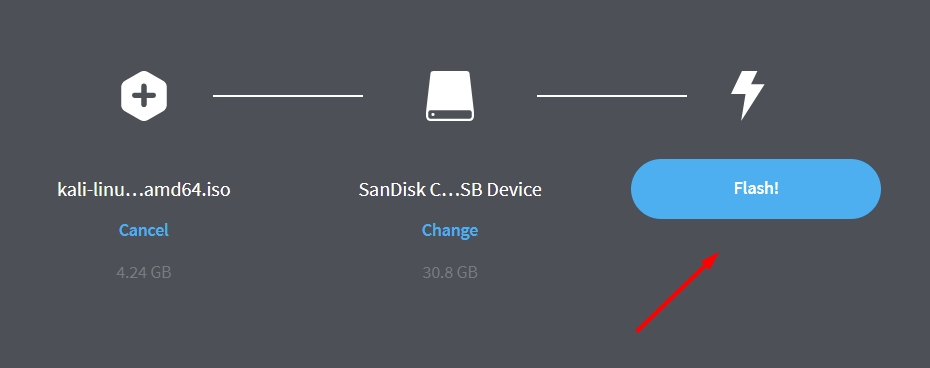
You may need to give administrative approval to proceed.
The flashing process will then start, and it might take a few minutes, depending on the speed of your USB drive and the size of the Kali Linux image. - Wait for Completion: Once the flashing is complete, Balena Etcher will verify the write process to ensure everything went as planned. When it’s done, you’ll see a confirmation message.
After completing these steps, your USB drive is now a bootable Kali Linux installer. You can proceed to use it to boot Kali Linux on your computer.
Step 4: First boot with the USB drive
Most computers can boot from a USB drive right away, but the process can vary slightly depending on your computer’s brand and the BIOS or UEFI firmware it uses.
The typical process for most computer brands looks like that:
- Restart Your Computer: With the bootable USB drive still inserted, go ahead and restart your computer.
- Enter the Boot Menu: When your computer starts, you’ll need to get to the boot menu.
This is usually done by pressing a specific key repeatedly as the computer begins to boot.
Common keys include F12, F10, F2, or Esc.
The exact key may vary depending on the manufacturer of your computer. If you’re not sure, a quick search using your computer model and “boot menu key” should help you find it. - Select Your USB Drive: Once in the boot menu, use the arrow keys to navigate to the option that allows you to boot from a USB drive.
This might be listed under “Hard Drive Buses” or directly as an option.
Select it and press Enter. - Boot into Kali Linux: After selecting your USB drive, your computer should start booting Kali Linux from the USB. You might be presented with a menu asking if you want to run Kali live or install it.
If you’re just testing it out, “Live” mode is a good choice, as it won’t make any changes to your computer.
Download your exclusive free PDF containing the most useful Linux commands to elevate your skills!
If you run into trouble, consulting your computer’s or motherboard’s user manual for instructions on accessing the boot menu and selecting a boot device can be very helpful.
It’s also possible to access the BIOS and set the USB drives in top priority, so it will automatically boot on it when you plug your USB drive with Kali on it.
Optional: Enable persistent storage
Enabling persistent storage on your Kali Linux bootable USB allows you to save changes across reboots, which means your documents, tools, and system settings will be preserved.
Try it for free now, with advanced security features.
2900+ servers in 65 countries. It's free. Forever.
This is really useful if you use Kali Linux regularly but don’t want to install it directly onto a computer.
Here’s a simplified guide to setting up persistence:
- Create a Second Partition on the USB Drive: After creating your bootable Kali Linux USB, the next step is to partition the unused space on the USB drive for persistent storage.
You can use a tool like GParted for this. The partition should be formatted with an ext3 or ext4 filesystem.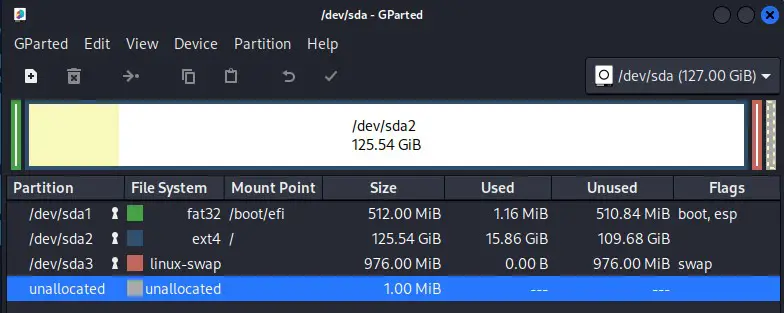
- Label the Partition: For Kali Linux to identify the partition as persistent storage, it must be labeled “persistent”. You can set the label during formatting, or use a disk utility tool afterwards.
- Create a Persistence Configuration File: Once the partition is ready, you’ll need to mount it and create a configuration file named “persistence.conf”.
The file should contain the text “/ union”, which tells Kali to overlay the persistent storage on top of the filesystem.
For example, if your persistent partition is /dev/sda3, you’ll run these commands:sudo mkdir -p /mnt/usb_drive
sudo mount /dev/sda3 /mnt/usb_drive
echo "/ union" | sudo tee /mnt/usb_drive/persistence.conf
sudo umount /mnt/usb_drive
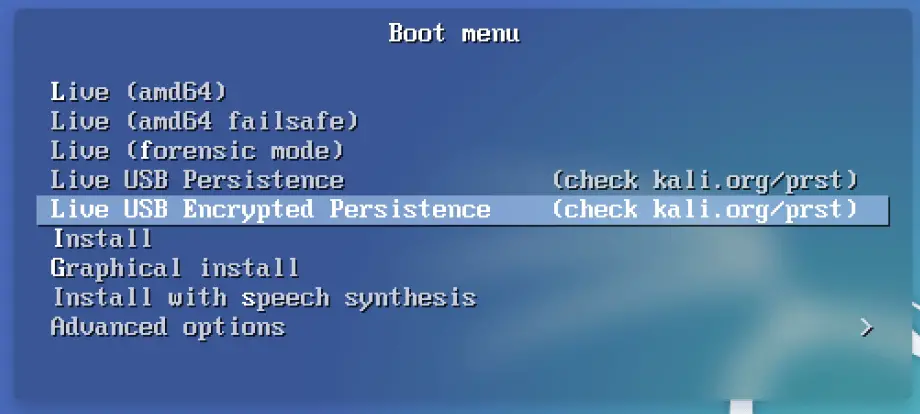
It will mount the partition, and create the persistence.conf file on it. - Boot with Persistence Enabled: Then, when you boot Kali Linux from the USB drive, you’ll need to choose the option that enables persistence. You’ll see this option in the boot menu, something like “Live system (persistence)”, “Persistent mode”, or similar.
- Verify Persistence: To test if persistence is working, make a noticeable change (like creating a new file or modifying a setting), then reboot and check if the change persists.
Remember, the process of creating and managing partitions, as well as editing and mounting them, requires careful attention to detail to avoid data loss. Always back up important data before modifying partitions on your USB drive.
You can check the official documentation for more details about this process.
Going further
You now have access to the complete Kali Linux system as if it were installed as your main operating system. Using it from there is no different than having it on your typical hard drive. So feel free to explore all the tutorials I have on the website:
- How To Change Username & Password in Kali Linux
- Wine on Kali Linux: How to set up and run Windows apps
- How To Login As Root On Kali Linux? (GUI & SSH)
Whenever you’re ready for more security, here are things you should think about:
- Break free from Gmail:
You should be able to choose what happens to your data. With Proton, only you can read your emails.
Get private email.
- Protect yourself online:
Use a high-speed Swiss VPN that safeguards your privacy. Open-source, no activity logs.
Get Proton VPN risk-free.
- Master Linux commands:
A sure method to learn (and remember) Linux commands. Useful ones only, one at a time, with clear explanations.
Download the e-book.