How To Format USB Drives The Right Way On Kali Linux
Kali Linux comes handy with many tools pre-installed for hacking and security, but there is nothing magical to handle your USB drives. It’s Linux, and you have to learn a few things before being comfortable with it. Don’t worry, I’ll show you 2 ways to format your USB drives with Kali Linux in this article.
The easiest way to format USB drives on Kali Linux is to use Gparted, which is preinstalled. It’s a graphical partition manager, allowing you to create, format and mount partitions in a few clicks.
Never used it? No problem, I’ll explain each step in details. And I’ll also give you the instructions to do it via the command line if you don’t have access to the desktop environment.
Your essential Linux handbook
Want to level up your Linux skills? Here is the perfect solution to become efficient on Linux. 20% off today!
Download now
Method 1: Use Gparted to format your USB drive
Gparted is an excellent tool to see and manage storage drives on Linux. It’s preinstalled on Kali Linux and can be used to format USB drives.
Try it for free now, with advanced security features.
2900+ servers in 65 countries. It's free. Forever.
Here is how to use it:
- Plug your USB drive
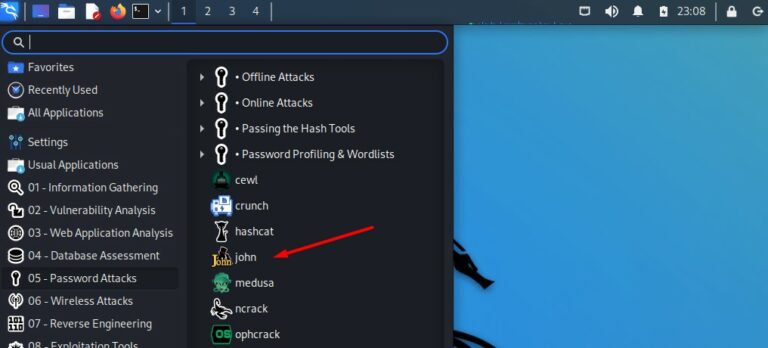
- In the main menu, go to Usual applications > System
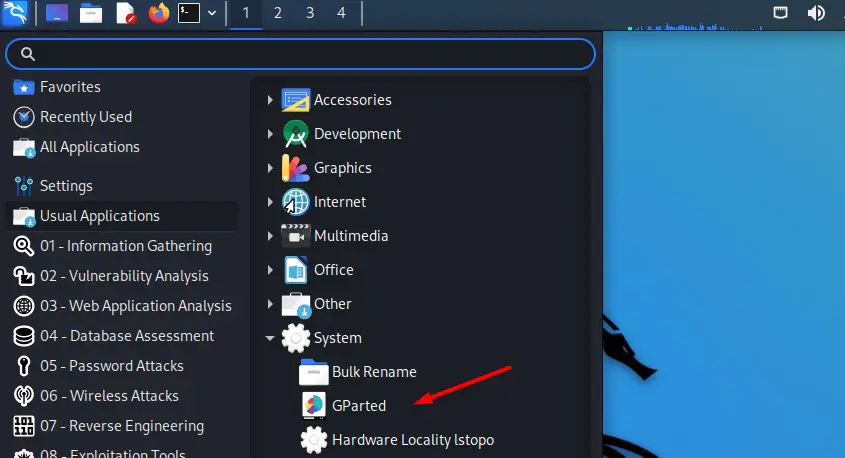
- Find Gparted in the list.
You can also use the search engine to find the shortcut directly. - The main window looks like this:
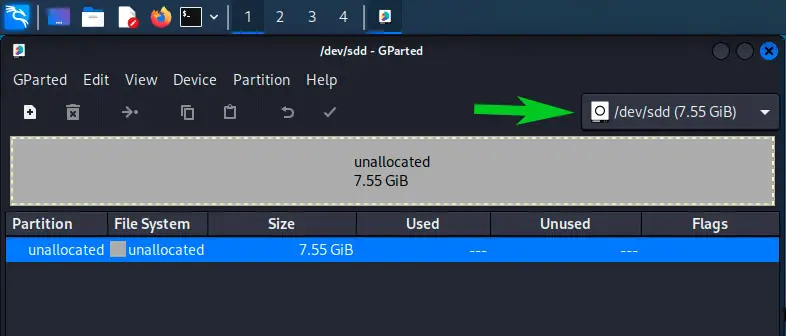
- Select your USB drive in the top-right corner.
You should see the current partition table directly.
If you are reading this, I guess there is nothing on the USB drive, or an unsupported file system.
From there, you can do everything visually: delete the existing partition table, create a new one, create a new partition and format it as you want.
So, if like me your USB drive is empty, you can follow these steps:
- Do a right-click on the unallocated space, and create a new partition table.
- Do it again, and create a new partition:
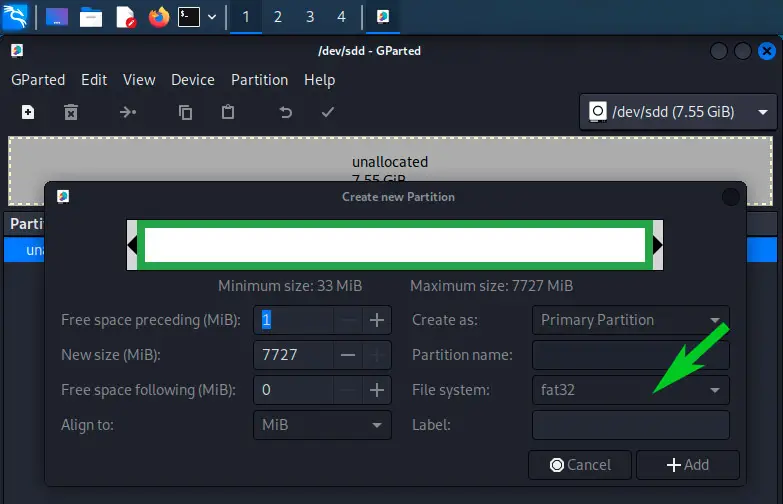
A form like this shows up. The only thing mandatory here is to select the file system.
Keeping “fat32” is probably a good idea, but I explain the different possibilities at the end of this article if you need further information. - You can create several smaller partitions, use labels or give them different names if you like. But most of the time, you’ll only create one big partition that takes up all the free space.
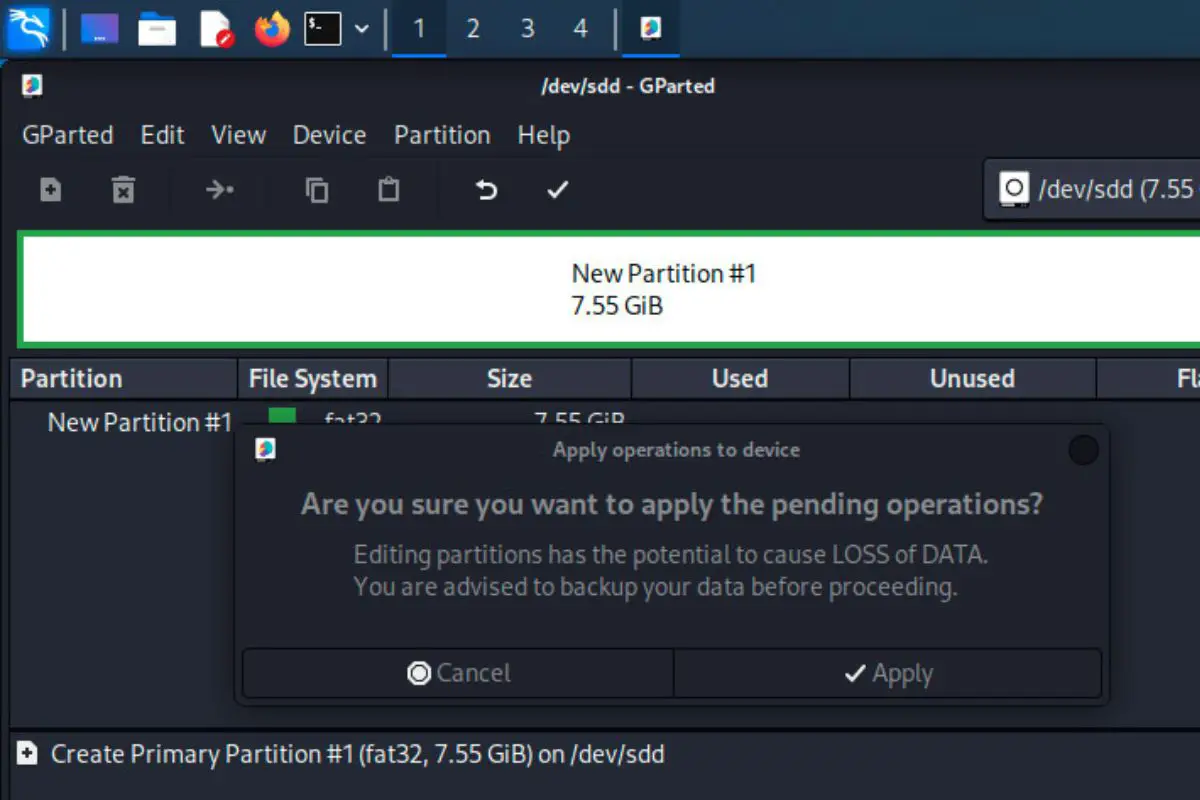
- Click “Add” to see your changes on the main screen:
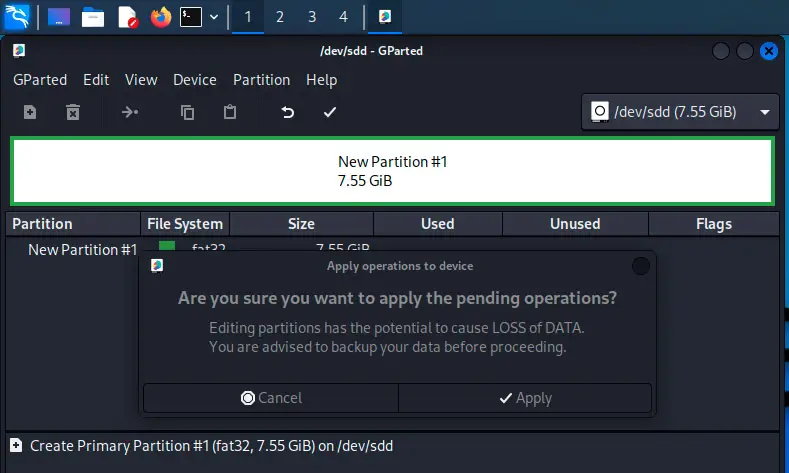
- The last step is to click the green tick in the top bar, to apply your changes on the drive.
After a few seconds, your USB drive will be updated and your partition read to use.
Download your exclusive free PDF containing the most useful Linux commands to elevate your skills!
From there, you should get access to your USB drive directly in the file explorer each time you plug it back to your computer. FAT32 should work on all operating systems (including Windows).
Check the FAQ at the end of this article if your USB drive is not mounted automatically.
Method 2: Format USB drives from the terminal
USB drives can also be mounted from a terminal or via SSH when no desktop environment is available. The fdisk command list the drives connected to the computer, and the mount command can then be use to get access the drive content.
Identify your USB drive
The first step is to plug your USB drive to your computer running Kali Linux, and then identify the disk name. The disk name format is generally something like /dev/sdX where X is often a letter between “a” and “f”, depending on the number of hard drives you have.
Anyway, use this command to list all your drives:sudo fdisk -l
You’ll get something like that:
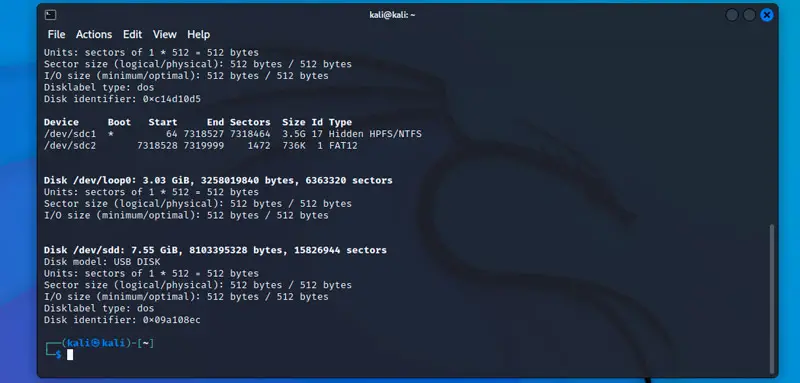
The USB drive will often be the last one in the list, in my case it’s “/dev/sdd”. It says “USB DISK” and the size matches (7.55 GiB).
I did the example with an empty USB drive, so there is an additional step for me: initializing the USB drive.
Optional: Create a partition table and partition
This step is optional. If there is already one partition on your USB drive, you can just skip this and go to the formatting directly. But with a brand new USB drive, you’ll need to do this:
- We’ll use fdisk to manage the partition table and create the new partition:
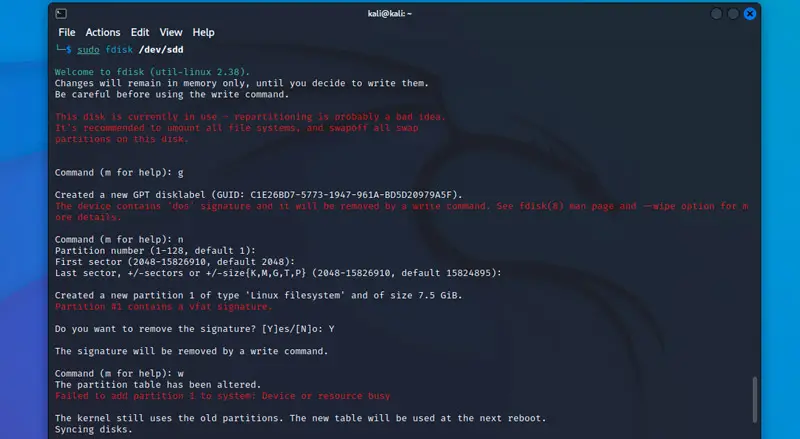
sudo fdisk /dev/sdd
Warning: make sure you are using the correct disk name here.
Following this step with the wrong one will delete all the content store on this disk. - Create a new partition table:
n - It will ask a few questions, just keep the default values.
- Confirm with “Y” to remove the signature if asked.
- Write the changes to your disk with:
w
Here is the full trace of my test:
Download your exclusive free PDF containing the most useful Linux commands to elevate your skills!
And you can use fdisk again to check the result:sudo fdisk -l /dev/sdd
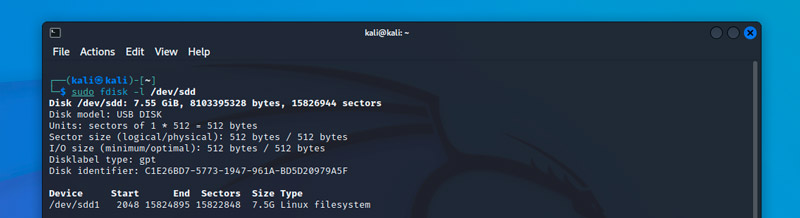
As you can see on this screenshot, I now have one partition available on my USB drive, I just need to format it.
Format a partition in command line
Formatting a partition in a terminal is not that complicated, the main syntax looks like this:
sudo mkfs.<FILESYSTEM> <PARTITION>
Secure your spot in the Accelerator Program, with early access to exclusive resources.
Get 1000+ classes, unlimited mentorship, and more.
The file system will generally be FAT32 (vfat), EXT4 (ext4) or NTFS (ntfs).
So, the corresponding command can be:sudo mkfs.vfat /dev/sdd1
sudo mkfs.ext4 /dev/sdd1
sudo mkfs.ntfs /dev/sdd1
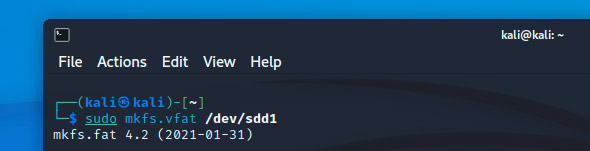
I want to format mine in FAT32, so I’m using the first command.
Notice that this time we use the partition name (/dev/sdd1), not the device name (/dev/sdd).
Read the FAQ below to know how to mount your USB drive if it doesn’t work automatically when you plug it.
FAQ
What format does a USB drive need to be for Linux?
Most Linux distributions can read and write on various partition formats, but the most common are:
- FAT32: Compatible with all operating systems, but limited to files smaller than 4 GB.
- NTFS: To be used with Windows computers (no limitation).
- EXT4: To be used on Linux systems only.
How to mount USB drives on Kali Linux?
In theory, Kali Linux should automatically mount USB drives when you plug them.
If it’s not the case, you can use a few command lines to mount it manually:
- Note the partition name in Gparted (/dev/sdd1 in my case, see the screenshot below).
Change the following commands with your partition path if needed.
Use “fdisk -l” if you don’t have a graphic interface. - Create a new directory where you’ll mount the partition, for example:
sudo mkdir /mnt/usb - Use the mount command:
sudo mount /dev/sdd1 /mnt/usb - This will give you access to the files stored on your USB drive.
It shouldn’t be necessary on Desktop, but at least you know how to do it if needed.

Check my related articles that might be of interest for you:
- How To Install & Use Wireshark On Kali Linux
- How to Install and Use Hashcat to Decrypt MD5? (Tutorial)
- How Are Passwords Stored? (5 Methods Used by Developers)
Whenever you’re ready for more security, here are things you should think about:
- Break free from Gmail:
You should be able to choose what happens to your data. With Proton, only you can read your emails.
Get private email.
- Protect yourself online:
Use a high-speed Swiss VPN that safeguards your privacy. Open-source, no activity logs.
Get Proton VPN risk-free.
- Master Linux commands:
A sure method to learn (and remember) Linux commands. Useful ones only, one at a time, with clear explanations.
Download the e-book.