Mastering Netcat on Kali Linux: A beginner’s guide
Kali Linux comes preinstalled with so many tools, that it’s hard to know about all of them, and even harder to know how to use them all. Netcat is one of those tools, hidden in the command line, that might be very useful in various situations. Let’s take a few minutes to discover it.
As the name suggests, Netcat is a network tool (“net”) that can be used to read data (“cat”) on a network connection. It can also send data to a specific IP address and port (open a connection to an FTP server, for example).
Let’s start with a bit of theory about this command, and I’ll you show basic examples after that.
Your essential Linux handbook
Want to level up your Linux skills? Here is the perfect solution to become efficient on Linux. 20% off today!
Download now
Netcat introduction
What is Netcat?
Netcat is a network utility tool, that can read and write data on network connections. It’s a lightweight and simple application, that you can use in command lines for various situations.
It can use either TCP or UDP, and is built to be used in other programs. So, if you have scripts for pentesting, you can easily include a few lines using netcat in them.
I have found two websites related to this project, that don’t look to be updated, but just for your information, you can check:
- The GNU Netcat project: it looks like the original one, with no update since 2004.
- The Netcat 1.10 page: Referenced as the official website for Netcat, but doesn’t look up-to-date either.
Read them for more details about Netcat, but it’s probably better to use the version included on Kali Linux and follow the instructions below if you want something up-to-date.
Netcat use cases
Try it for free now, with advanced security features.
2900+ servers in 65 countries. It's free. Forever.
On a typical Linux system, Netcat is often used like an FTP server, to open a connection between two computers, send messages or transfer files.
On Kali Linux, this tool can also be useful for pentesting or stealth network usage. For example, it’s possible to create a backdoor with it. I’ll show you some concrete examples later in this article.
How to install Netcat on Kali Linux
In most cases, Netcat is installed by default on Kali Linux, it’s part of the essentials tools that are included during the installation if you keep the default options.
The main command is “nc”, so if you tried “netcat” and it doesn’t work, it’s normal ;-).
Download your exclusive free PDF containing the most useful Linux commands to elevate your skills!
The package name is netcat-traditional, so if you don’t have it already installed on your system, you can get it with APT. Run this command in a terminal:sudo apt install netcat-traditional
That’s it, Netcat is installed on your system, and you have a broad idea of what it is.
Let’s see how to use it in a few concrete examples.
Getting started with Netcat: main commands
Open a connection
A classical first command to try with Netcat is to open a connection to another host.
You can do this by using this syntax:nc <host> <port>
So, for example, if you want to connect to InfosecScout via HTTP, you’ll use something like:nc infosecscout.com 80
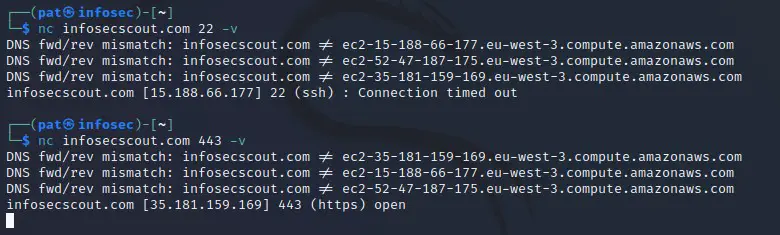
Note: At first, I recommend to always enable the verbose mode (-v), so you can see everything happening in real-time. Most of the time, the output is almost empty, and it’s hard to debug any problem with what you’re trying to do.
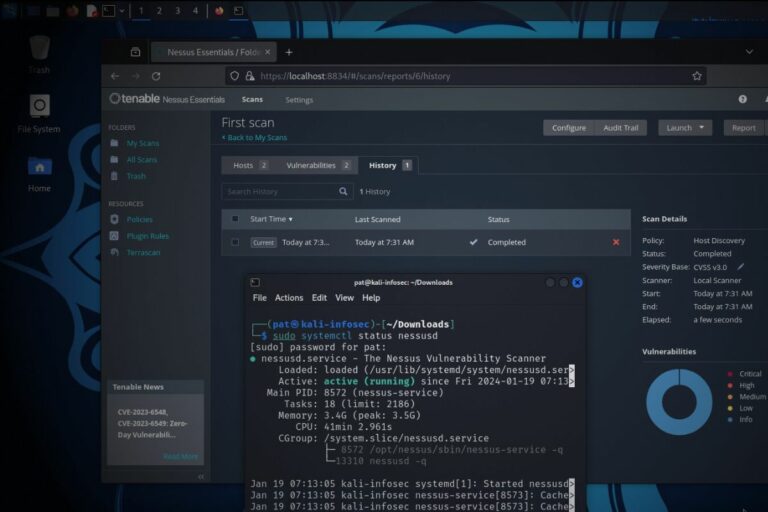
In my screenshot, you can see that the SSH port is not responding (time out) but the HTTPS is open.
Once connected, you can send a message to the host (following the protocol rules, obviously).
So, this first example is similar to what you can do with Nmap. You can use netcat to check if a port is open. You can then interact with the host if the port is open, but it’s already pretty useful with this first step.
Listen to a specific port
As mentioned in the introduction, netcat works in both directions. It can send or receive data from the network connection.
Another typical on how to use Netcat is to open a port on the Kali Linux computer, and record what’s going on.
For this example, I open the port 1234 on my Kali system. I do this with the command:nc -v -lp 1234
- -v: verbose mode.
- -l: listen mode.
- -p: specify the port to listen to.
Once the port open, if you try to reach it from another computer (with the verbose mode enable), you’ll receive all the headers sent by the other computer:
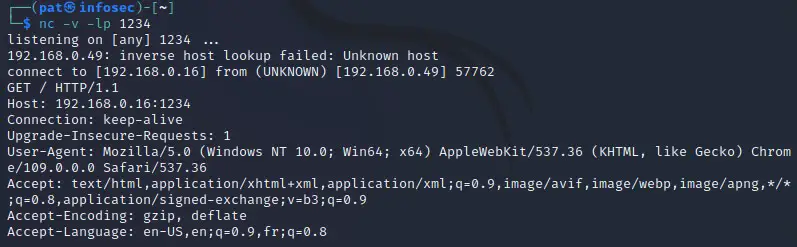
For this example, I tried to reach the port 1234 from the browser of my other computer.
We can see it’s a Windows computer, using Chrome 109 and IP address 192.168.0.49.
Well, if you try to do some kind of phishing, BeEF is probably a better tool (check my tutorial here), but netcat is really simple and works with all protocols.
Other commands
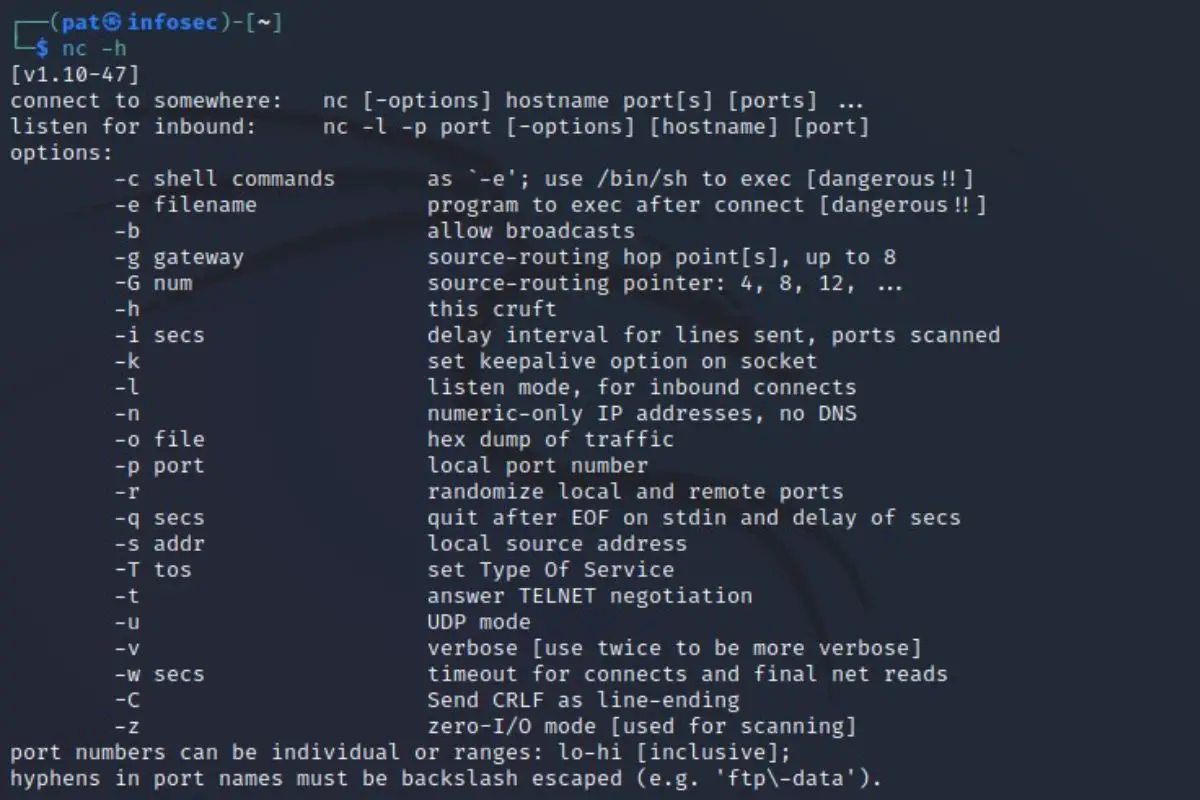
Netcat doesn’t have tons of options, so you can use the help in a terminal to find more things you could try.
Use this command to get the list:nc -h
You’ll get something like that:
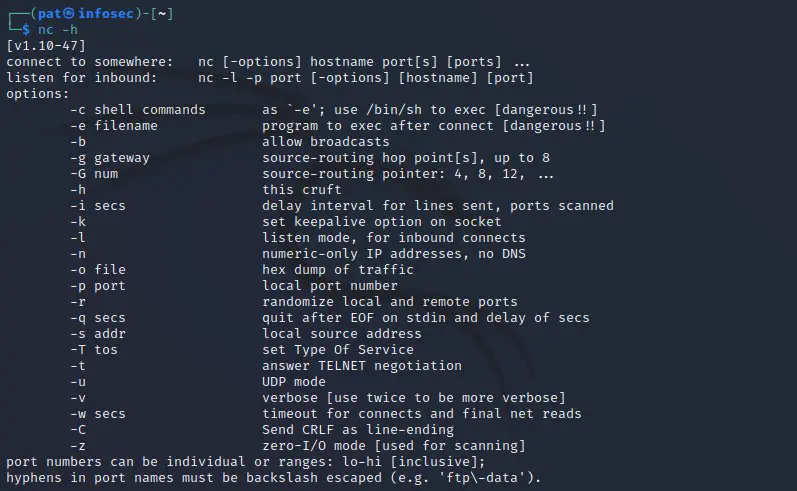
You can see the ones we already tested, and experiment with the other options that you might find interesting.
Going further: practical cases where you can use Netcat
Download your exclusive free PDF containing the most useful Linux commands to elevate your skills!
Now that you have played a bit with the basic options, let’s see how you could use this in real scenarios.
File transfers
As I mentioned earlier, one of the common use of Netcat is to do file transfers with it. It’s not really built for this, but as you can easily open a connection between two computers, it’s one way to use it that you can try.
Just remember that:
- Netcat is required on both computers to transfer a file from one to the other.
- By default, Netcat doesn’t use encryption. It means that anyone listening on the network could intercept the files transferred.
- Many other options are better suited for file transfer between two Linux computers (SFTP for example).
It’s a fun test, but it’s not necessarily something you should use all the time.
Anyway, here is how to do this:
Join the Complete Ethical Hacking Course Bundle and step into the world of cybersecurity.
Learn to think like a hacker and protect systems with this comprehensive course.
- On the receiver host, configure it to listen and redirect the output to the destination file:
nc -l > yourfile - On the sender host, you can now connect to the receiver and send the file with:
nc -w 5 <IP> <PORT> < yourfile
Your file will be transferred from the received to the sender.
Backdoor
As Netcat can listen to any port on any device once installed, one of the possible use is to create a backdoor with it. It’s also very light, so it can be hidden on a system, without the end-user knowing that it’s there.
The theory is to install Netcat (or at list save a compiled version of nc.exe) on the target computer, configure it to start on boot automatically, listening to a specific port. You can then connect to this computer with Netcat, and send any command to it.
I won’t explain all the details here, but you can find a pretty good tutorial on Instructables if you want to learn more about this strategy.
Tunneling
Another typical usage for Netcat, is to have your device in the middle, listening on one port, and transferring everything to another host. That’s what I call “tunneling”.
Example:
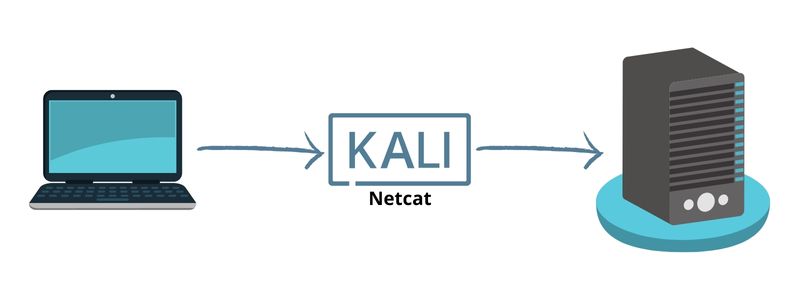
- User: open a connection to Host A, with port 1234.
- Host A: has netcat listening on port 1234, save user commands and send them to Host B.
- Host B: host the service the user is looking for.
Netcat can then be used for good (acting like a proxy, to forbid direct access to Host B), but most likely, to intercept everything and do whatever you want with the data :-).
You can find several examples in this article if you want more details about these strategies.
I hope this article was useful to better understand what Netcat is, and how you can use it in your projects. If you want to learn more about Kali Linux, I have plenty of tutorials on this website that you might be interested in, here are a few examples:
- Wifite: A step-by-step guide for Kali Linux users
- How To Remote Access Kali Linux
- Kali Linux: How to Capture Screenshots Like a Pro
Whenever you’re ready for more security, here are things you should think about:
- Break free from Gmail:
You should be able to choose what happens to your data. With Proton, only you can read your emails.
Get private email.
- Protect yourself online:
Use a high-speed Swiss VPN that safeguards your privacy. Open-source, no activity logs.
Get Proton VPN risk-free.
- Master Linux commands:
A sure method to learn (and remember) Linux commands. Useful ones only, one at a time, with clear explanations.
Download the e-book.